Introduction
In the intricate world of jewelry creation and repair, achieving flawless results demands precision and control. The jewelry micromotor is a vital tool that gives artisans the accuracy and efficiency they need for delicate work. This guide will illuminate what a jewelry micromotor is, how it operates, and the diverse ways it enhances jewelry craftsmanship.
Demystifying the Jewelry Micromotor
A jewelry micromotor is a small, high-speed tool made for the detailed work jewelry making requires. It’s like a tiny powerhouse that lets you manipulate materials with incredible accuracy.
What Exactly is a Jewelry Micromotor?
A jewelry micromotor system essentially comprises a lightweight, ergonomic handpiece connected to a control unit. The control unit powers the handpiece and lets you adjust the speed. What makes it versatile is that you can swap out attachments for different tasks.
Key Components at a Glance
Let's break down the core elements:
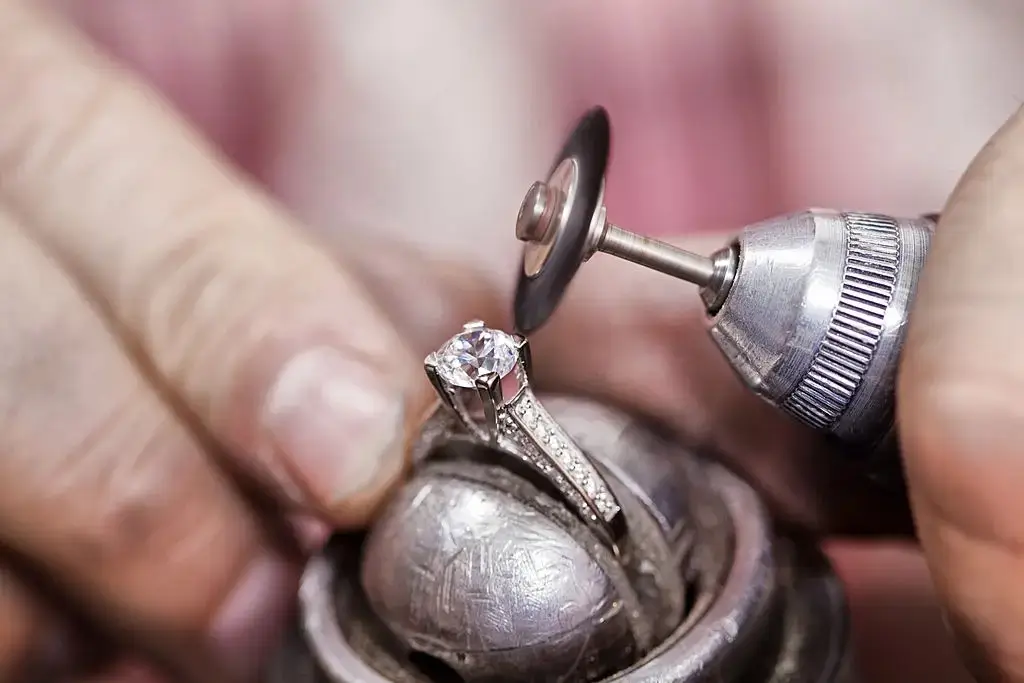
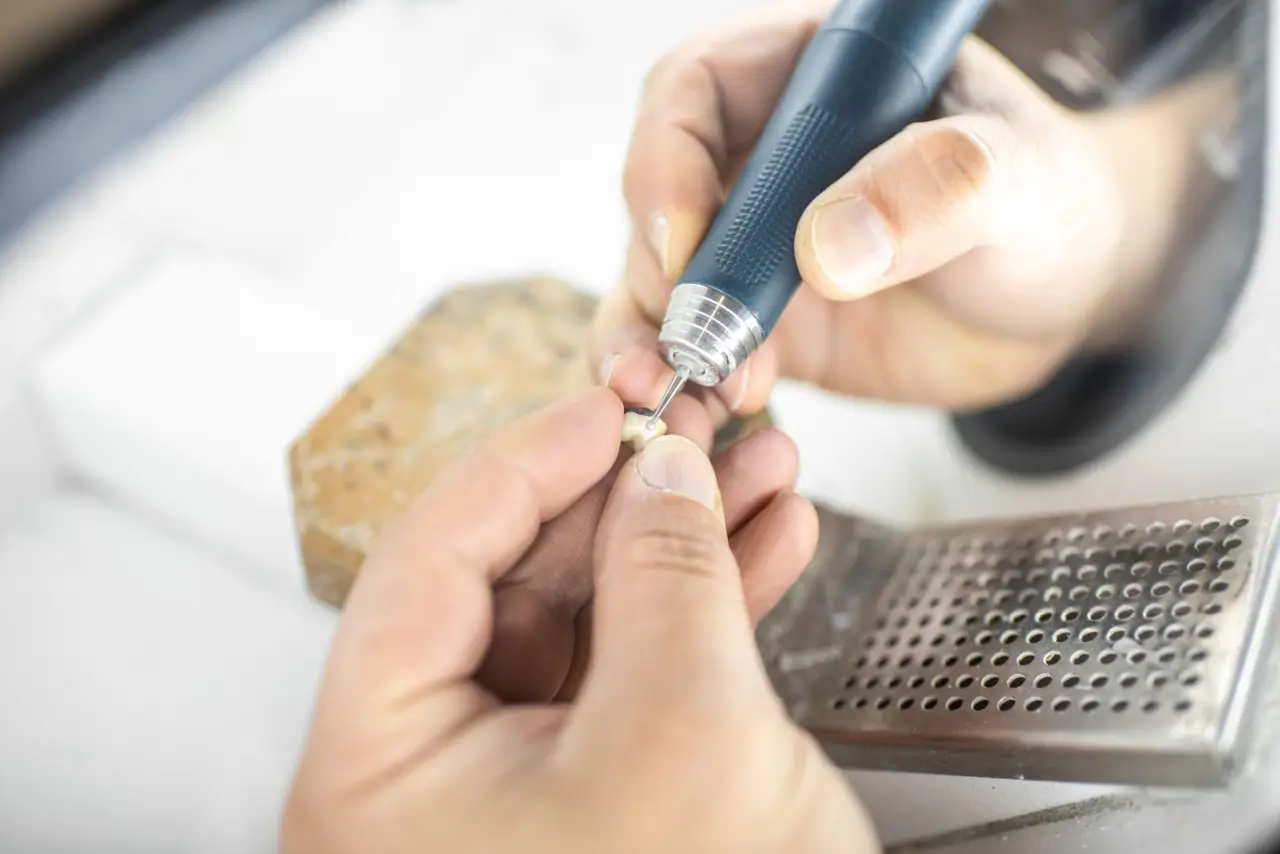
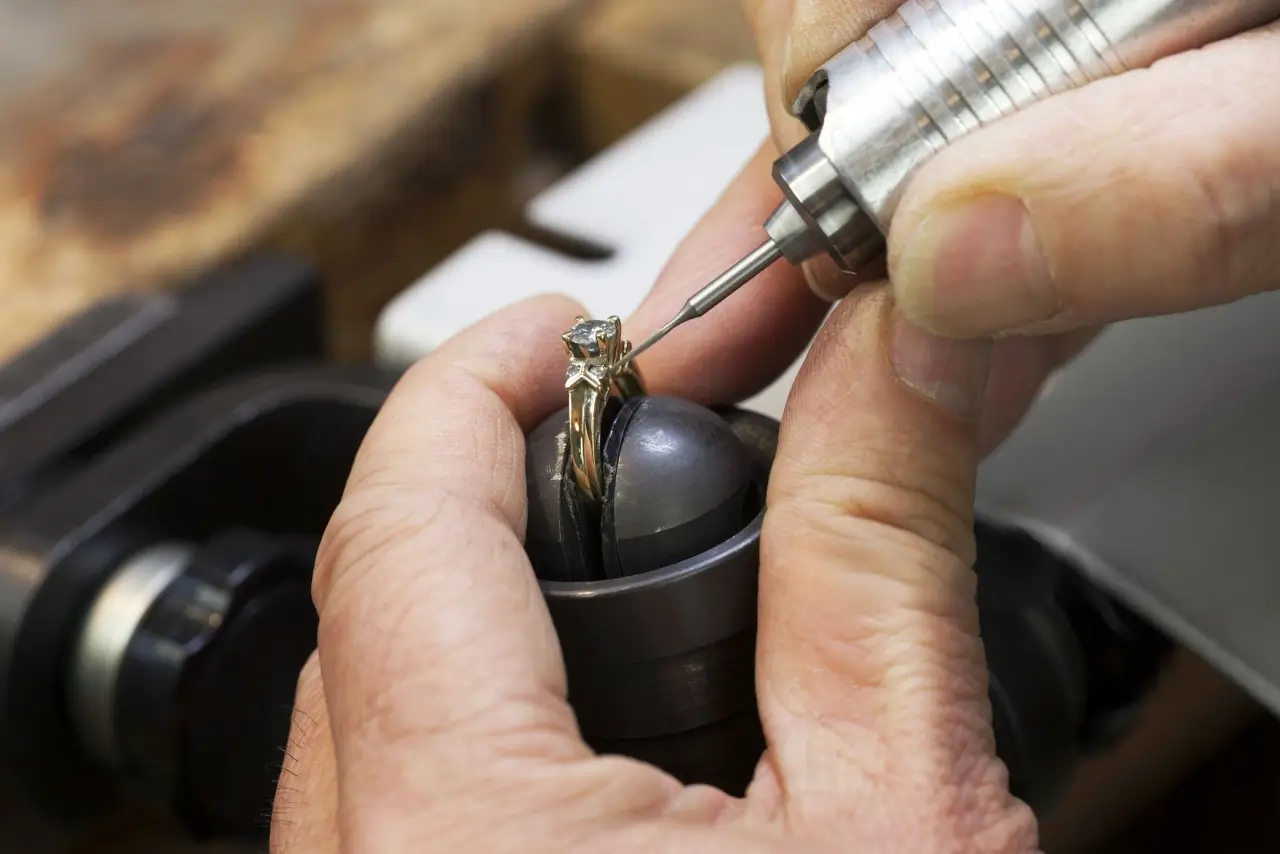
• Handpiece: The part you hold. Designed for comfort and precise handling, it contains a small, powerful motor and a collet or chuck to secure various attachments.
• Control Unit: The power hub. It connects to a power source and allows you to control the motor's speed, often via a foot pedal or dial. Advanced units offer features like reverse rotation and digital displays.
• Rotary Attachments: The working ends. A vast array of burs, discs, and polishers designed for specific tasks like grinding, polishing, drilling, and engraving.
Why Choose a Jewelry Micromotor?
Compared to traditional hand tools, a jewelry micromotor offers significant advantages:
• Enhanced Speed and Efficiency: Completes tasks much faster and more consistently.
• Superior Precision and Control: Enables intricate work with minimal risk of damage.
• Versatile Applications: A single tool can perform multiple functions with different attachments.
• Reduced Fatigue: Ergonomic design allows for comfortable use during extended periods.
The Inner Workings: How a Jewelry Micromotor Functions
Understanding the mechanics of your jewelry micromotor empowers you to use it effectively and safely.
Powering the Precision: A Simple Workflow
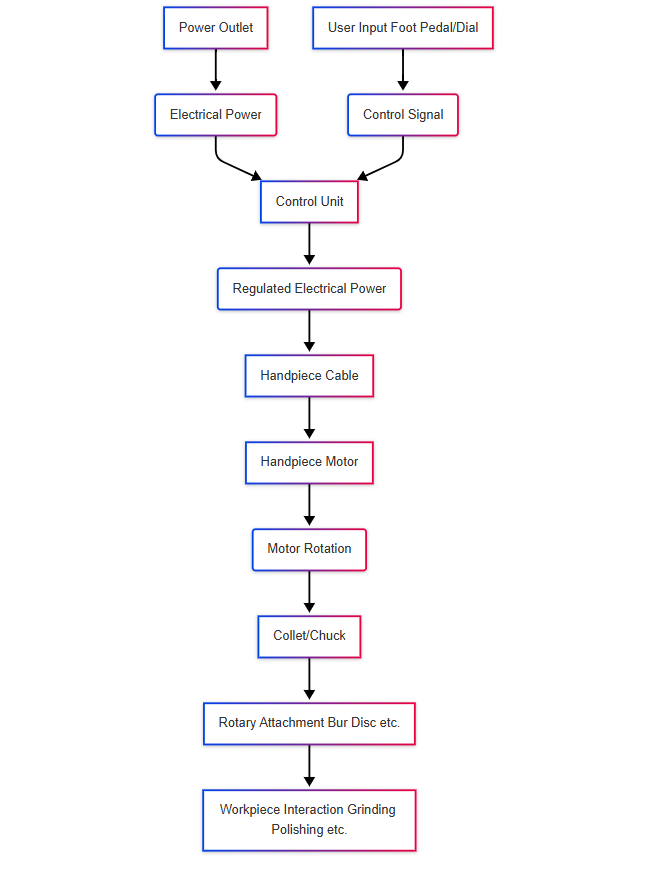
Key Stages Explained
• Power Source and Control: You plug the control unit into a power outlet,then use a foot pedal or dial to set the speed you want.
• Regulated Power Delivery: The control unit adjusts the electrical power sent to the handpiece based on your input.
• Transmission to the Handpiece: The regulated power travels through a flexible cable to the motor within the handpiece.
• Rotary Motion: The electric motor converts electrical energy into high-speed rotational motion.
• Attachment Interface: The collet or chuck transfers the rotation to whatever bur,disc,or polisher you’ve attached.
• Performing the Task: The rotating attachment then interacts with the jewelry piece to achieve the desired outcome.
Quick Attachment Changes
The jewelry micromotor's adaptability shines through its interchangeable attachments. A simple mechanism, either a collet or a chuck, allows for quick and secure tool changes, enabling seamless transitions between different tasks.
Unleashing the Potential: Applications in Jewelry Making
The jewelry micromotor is a true workhorse in the jewelry studio, capable of a wide array of applications:
Refining Surfaces: Grinding and Polishing
Use different burs and attachments to grind and polish your jewelry. This lets you remove excess material, shape details, and make metal surfaces shine.
• Grinding: Use different grit burs to remove material and shape your designs.
• Polishing: Employ a range of buffs and polishing compounds for a mirror-like finish.
Adding Detail: Engraving and Detailing
Create personalized and intricate designs with precision engraving burs. Etch lines, patterns, and textures onto metal surfaces with exceptional control.
• Engraving: Use fine-tipped burs to create detailed lines and lettering.
• Texturing: Employ specialized burs to add unique surface finishes.

Creating Openings: Drilling and Cutting
Make precise holes for stone settings, stringing, or assembly using various drill bits. Thin cutting discs allow for accurate trimming and shaping of metal components.
• Drilling: Create clean and accurate holes in metal and some gemstones.
• Cutting: Trim excess material or create openings with specialized cutting discs.
Securing Gems: Stone Setting
Precisely create seats and channels to securely hold gemstones. The jewelry micromotor allows for the delicate manipulation of metal around stones for a professional and secure setting.
• Bead Setting: Form small beads of metal to hold stones in place.
• Prong Setting: Shape prongs to securely grip gemstones.
• Channel Setting: Create channels to hold a row of stones.
Conclusion: Elevate Your Craft with a Jewelry Micromotor
The jewelry micromotor is more than just a tool; it's an extension of the jeweler's skill and creativity. Its precision, versatility, and efficiency make it an invaluable asset in any jewelry workshop. By understanding its components and how it works, you can unlock its full potential and elevate the quality of your creations.
Ready to experience the precision and power of a quality jewelry micromotor? Explore our range at RHJC and discover how it can transform your jewelry making process. Contact us today for expert advice and find the perfect jewelry micromotor for your needs.